The Simple Guide to Snatch Strap Recoveries
Whether you’re new to off-road touring or you’re a dyed in the wool explorer, getting bogged is a distinct possibility in some types of terrain. So, if you plan on driving in sand, mud or snow on one of your next trips, knowing how to do a snatch strap (or kinetic rope) recovery correctly is highly recommended.
What is a snatch strap recovery?
A snatch strap is a length of woven nylon strap that is designed to stretch during vehicle recovery. This stretch occurs when a free vehicle – which is attached to a bogged vehicle by way of the strap – pulls on the strap. This stretch is how the strap stores kinetic energy, and it’s this kinetic energy that will free the bogged vehicle. The free vehicle creates and transfers kinetic energy to the strap, and the strap transfers this energy to the bogged vehicle. This creates the ‘snatching’ effect that will pop the bogged vehicle out; hopefully, to a place where it can regain traction and carry on driving. The same principle applies to kinetic rope recoveries, which differ from a snatch strap in their construction and how much they can stretch. Snatch straps are typically capable of 20% stretch, while kinetic ropes are capable of around 30% stretch.
Gear you need
- - A stuck vehicle and a free vehicle that’s able to recover it
- - Rated recovery points on each vehicle
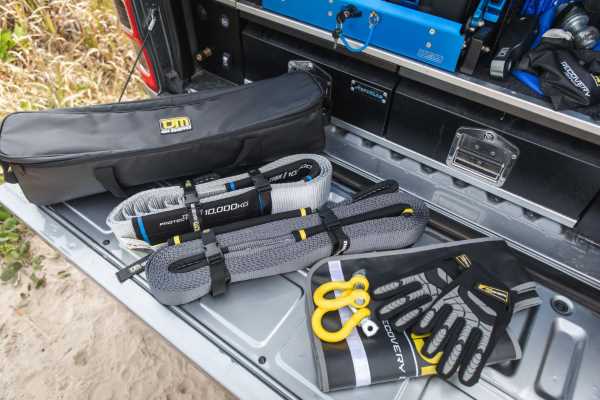
- - Some hard-wearing recovery gloves
- - Appropriately rated steel bow shackles or synthetic rope soft shackles
- - Appropriately rated recovery hitch for the free vehicle or both vehicles (if recovering backwards)
- - Appropriately rated equaliser strap (highly recommended but not essential)
- - A snatch strap or kinetic rope that’s rated to 2-3 times the GVM of the lightest vehicle in the recovery
- - A recovery blanket (also called a recovery damper)
Now, with that out of the way, let’s get into the procedure:
-
Assess the situation
Before we rush into a multi-vehicle, high-energy recovery, it’s always best to assess whether you can extract your vehicle with self-recovery tools first. This can include simple things like reversing and trying again, lowering your tyre pressures, digging a path or creating a new one with recovery boards – all of which aim to help your vehicle regain enough traction to continue along its intended path. However, if time is not on your side for trial and error, or the methods above aren’t feasible or won’t work, it’s time to think about getting prepared for a kinetic recovery.
-
Put on some gloves
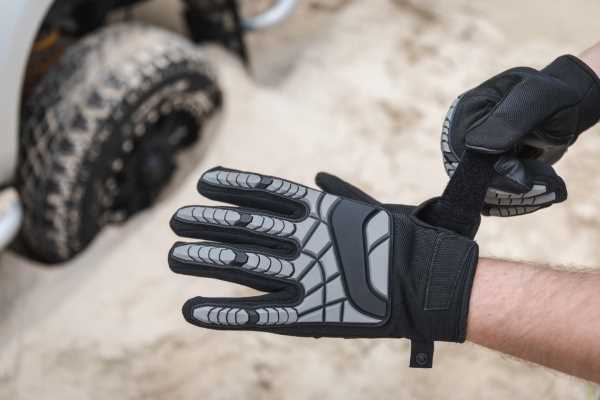
Once we’ve come to the conclusion that a kinetic recovery is the best solution, it’s time to get out the gear you need and put on some gloves. By getting everything you will need at the start, you’re ensuring nothing is missed when the time comes for the active part of the recovery. With the right gear now available and accessible, put on some gloves to ensure your hands are protected.
-
Clear a path
With some gloves on, you can now get down and clear a path to give you an unobstructed access to the recovery point(s) you will be attaching your shackles and straps to, which might be at the front or the back of the vehicle, depending on the placement of your recovery points and your particular recovery situation.
-
Get your straps
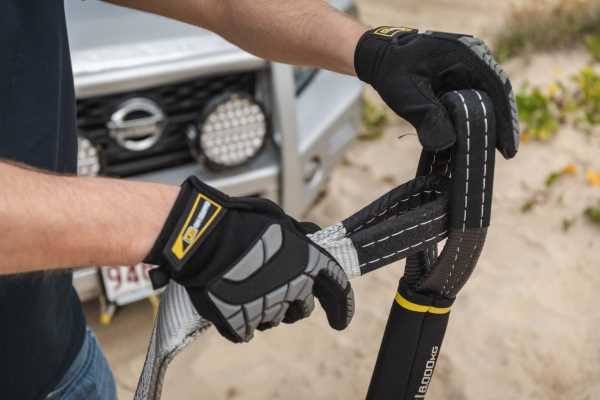
Place your snatch strap and your equaliser strap (optional) close to your recovery points. If you are using an equaliser strap, you’ll first want to thread it through the eyelet of your snatch strap until the end of the strap is in the middle of the equaliser strap’s span and put the eyes of the equaliser strap in front of the individual recovery point you want to attach each one to.
So, why do we recommend an equaliser strap, you might ask?
If you are recovering the vehicle in the direction of travel (forwards) and have access to two recovery points on the front of your 4x4, it’s worth considering an equaliser strap. Equaliser straps, unlike snatch straps, do not stretch. However, they are incredibly strong, and there are undeniable advantages of using one when you have the chance. Firstly, the main purpose of an equaliser strap is to spread the recovery load that occurs in the ‘snatching’ part of the recovery between two recovery points instead of one – meaning less stress on any one point of your vehicle. Secondly, an equaliser strap centralises the direction of pull from one side of your vehicle to the middle of your vehicle, which increases your chances of a simple, safe and successful recovery.
-
Attach shackles
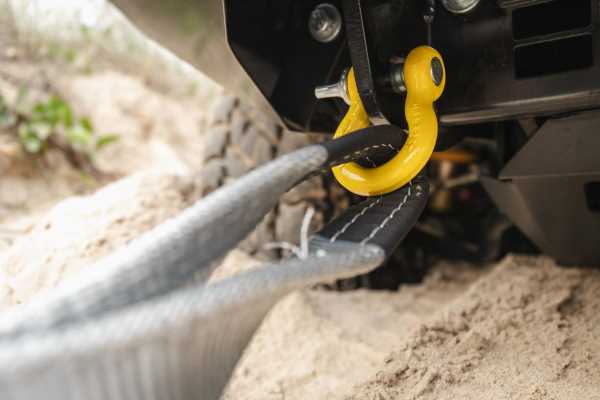
Shackles are the connection between your vehicle, the strap and the recovery vehicle, which means their quality and application are incredibly important. Any shackles you use in a recovery, whether they be steel bow shackles or synthetic rope soft shackles, should have an adequate load rating (Working Load Limit in steel and minimum breaking strength with synthetic shackles) to ensure they perform properly during the recovery. This rating will be stamped on steel shackles (generally 3.25T for 16mm shackles or 4.75T for 19mm shackles) or visible on a tag on a soft shackle.
If you’re using steel shackles: remove the pin, thread the eye of the equaliser (or snatch strap if you’re not using an equaliser strap) onto the bow of the shackle, then thread the pin through the recovery point and tighten, before loosening by a half-turn to ensure the shackle doesn’t bind during the recovery.
If you’re using synthetic soft shackles, make sure the recovery points you’re using are free of sharp edges that may fray or sever them. If they are, thread the soft shackle through the recovery point and the strap and then close the connection. If you’re using an equaliser strap, repeat this process with the other recovery point and its attaching shackle and equaliser loop.
-
Prepare your strap
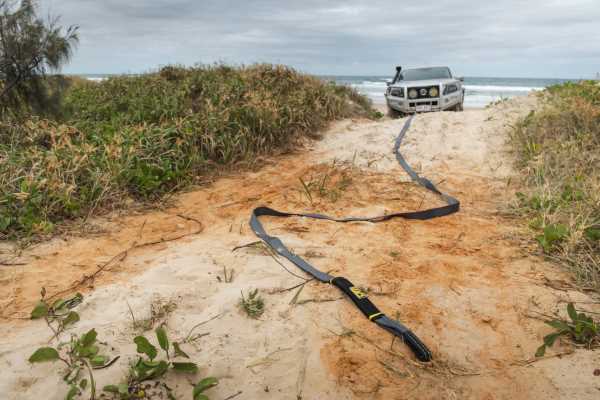
Now we have our strap properly attached to the vehicle that’s stuck, it’s time to ensure it’s well positioned before we get the recovery vehicle involved. To do so, run the length of the strap (most are 9m) out in a straight line from the vehicle (or as close as you can) and lay it down if possible. Then, place your recovery blanket in the middle of the span, ensuring it’s well attached. After this, create about 2m of slack in the strap by creating a lazy S shape with the end of it, preferably in a place the driver of the stuck vehicle can see it.
-
Bring in the recovery vehicle
It’s important to not rush this step ahead of the ones that have come before it. There is an element of risk in any recovery, but one thing is certain – it’s easier to get hurt by a mobile vehicle than one that is stuck. For this reason, you should keep the recovery vehicle away from the recovery site until it’s absolutely needed – and that time is now.
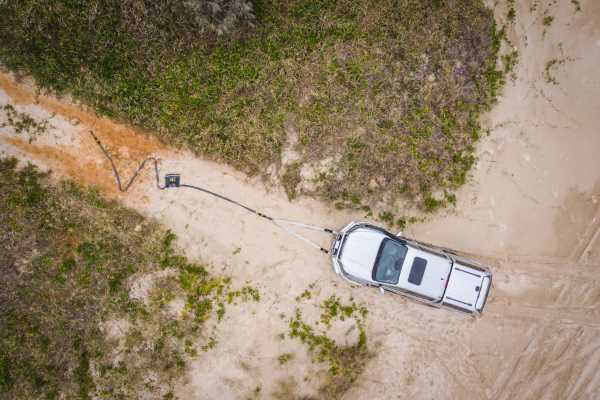
With our attachment points set, our strap laid out and our recovery blanket in place, we can now attach our remaining shackle(s) and strap(s) or rope to the recovery vehicle. Bring the recovery vehicle to the point where you can attach the snatch strap and retain our 2m of slack. This is essential because, as the recovery vehicle drives away, the slack is taken up – which is what loads the strap with kinetic energy to pass on to the bogged vehicle. Without any slack, there is less time to load the strap and achieve a smooth, predictable kinetic recovery.
-
Finalise your preparation
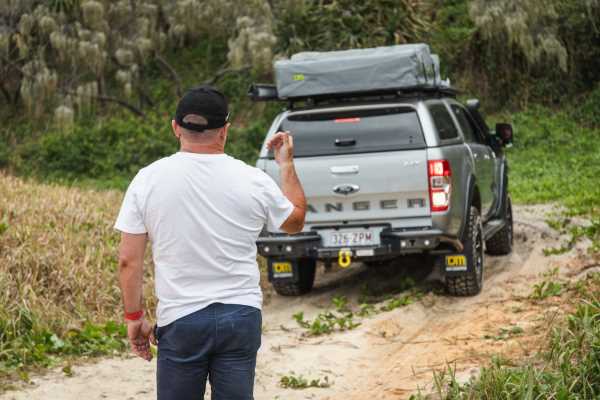
With everything set for the recovery, it’s now time to finish our preparation. Ensure any spectators or spotters aren’t within a radius of 1.5x the length of the strap, because this is now an active recovery zone. Next, agree a set of communications between the two drivers involved in the recovery. A simple ‘go’ and ‘stop’ signal are the most important, which you can communicate with a thumb out the window or a belt on the horn. However, in instances where you don’t have a clear line of sight from one vehicle to another, a UHF radio is essential.
-
Complete the recovery
With both drivers in their vehicles with seatbelts on, low range engaged and automatic vehicles in drive (manual vehicles generally in second), it’s time to begin the recovery.
The recovery vehicle driver is not trying to pull the stuck vehicle out, they’re simply trying to stretch the strap so it can do the hard work. This means that it’s not about how fast you go, but about how far you go. If the recovery vehicle can take up that 2m of slack in our strap or rope and progress 5m forward, logic then says that the stuck vehicle should have moved too (and hopefully to a place it can regain traction). With that in mind, the recovery vehicle doesn’t need to take off like a shot to jerk the end of the strap, but to simply try to drive ‘through’ the end of the strap smoothly.
The stuck vehicle driver should have their foot lightly on the throttle, while keeping their eyes on the strap. When the recovery vehicle starts to drive, the slack in the rope will be taken up and our lazy S will disappear. When this happens, it’s time to throttle on a bit more to contribute to the recovery, as well as be ready to drive onto firm ground once you’re extracted.
-
Reassess and pack up
Once both vehicles are on firm ground – ensuring there is slack in the rope or strap – both drivers can meet in the middle and ensure that both vehicles and the connecting recovery gear are in good condition. Straps that are sandy or muddy should be cleaned before you forget about them, as grit infiltrating your strap or rope can be abrasive and cause small tears in them. Straps that are visibly frayed or damaged should be replaced to ensure a safe and successful recovery next time.
If all is well, then congratulations! You have successfully completed a kinetic vehicle recovery, and it’s now time to pack away your gear and continue on your adventure.


